Game Design : Creating Dynamic 2D Water Effects in Unity
In
this tutorial, we're going to simulate a dynamic 2D body of water using
simple physics. We will use a mixture of a line renderer, mesh
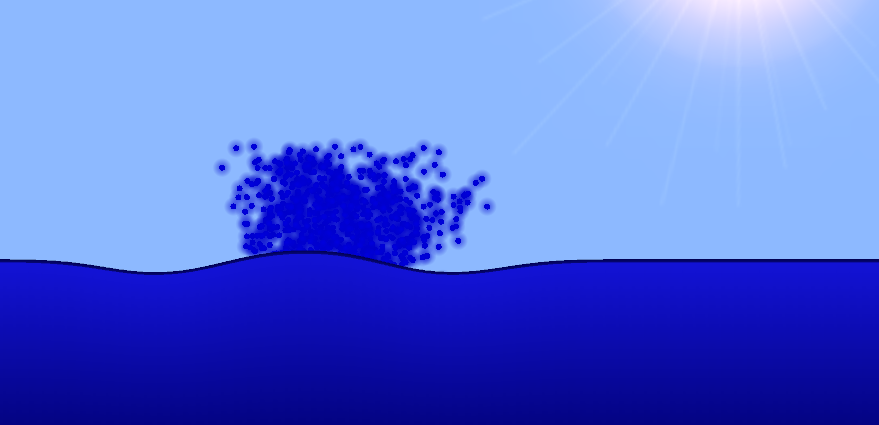
renderers, triggers and particles to create our effect. The final result
comes complete with waves and splashes, ready to add to your next game.
A Unity (Unity3D) demo source is included, but you should be able to
implement something similar using the same principles in any game
engine.
Here's what we're going to end up with. You'll need the Unity browser plugin to try it out. Click to create a new object to drop into the water.
Setting Up Our Water Manager
In his tutorial, Michael Hoffman demonstrated how we can model the surface of water with a row of springs.
We're going to render the top of our water using one of Unity's line
renderers, and use so many nodes that it appears as a continuous wave.
We'll have to keep track of the positions, velocities and
accelerations of every node, though. To do that, we're going to use
arrays. So at the top of our class we'll add these variables:
1
2
3
4
5
float[] xpositions;
float[] ypositions;
float[] velocities;
float[] accelerations;
LineRenderer Body;
The LineRenderer will store all our nodes and outline our body of water. We still need the water itself, though; we'll create this with Meshes. We're going to need objects to hold these meshes too.
1
2
GameObject[] meshobjects;
Mesh[] meshes;
We're also going to need colliders so that things can interact with our water:
1
GameObject[] colliders;
And we'll store all our constants as well:
1
2
3
4
constfloatspringconstant = 0.02f;
constfloatdamping = 0.04f;
constfloatspread = 0.05f;
constfloatz = -1f;
These constants are the same kind as Michael discussed, with the exception of z—this is our z-offset for our water. We're going to use -1
for this so that it gets displayed in front of our objects. (You might
want to change this depending on what you want to appear in front and
behind of it; you're going to have to use the z-coordinate to determine
where sprites sit relative to it.)
Next, we're going to hold onto some values:
1
2
3
floatbaseheight;
floatleft;
floatbottom;
These are just the dimensions of the water.
We're going to need some public variables we can set in the editor,
too. First, the particle system we're going to use for our splashes:
1
publicGameObject splash:
Next, the material we'll use for our line renderer (in case you want
to reuse the script for acid, lava, chemicals, or anything else):
1
publicMaterial mat:
Plus, the kind of mesh we're going to use for the main body of water:
1
publicGameObject watermesh:
These are all going to be based on prefabs, which are all included in the source files.
We want a game object that can hold all of this data, act as a
manager, and spawn our body of water ingame to specification. To do
that, we'll write a function called SpawnWater().
This function will take inputs of the left side, the width, the top, and the bottom of the body of water.
(Though this seems inconsistent, it acts in the interest of quick level design when building from left to right).
Creating the Nodes
Now we're going to find out how many nodes we need:
1
2
intedgecount = Mathf.RoundToInt(Width) * 5;
intnodecount = edgecount + 1;
We're going to use five per unit width, to give us smooth motion that
isn't too demanding. (You can vary this to balance efficiency against
smoothness.) This gives us all our lines, then we need the + 1 for the extra node on the end.
The first thing we're going to do is render our body of water with the LineRenderer component:
1
2
3
4
5
Body = gameObject.AddComponent<LineRenderer>();
Body.material = mat;
Body.material.renderQueue = 1000;
Body.SetVertexCount(nodecount);
Body.SetWidth(0.1f, 0.1f);
What we've also done here is select our material, and set it to
render above the water by choosing its position in the render queue.
We've set the correct number of nodes, and set the width of the line to 0.1.
You can vary this depending on how thick you want your line. You may have noticed that SetWidth() takes two parameters; these are the width at the start and the end of the line. We want that width to be constant.
Now that we've made our nodes, we'll initialise all our top variables:
01
02
03
04
05
06
07
08
09
10
11
12
xpositions = newfloat[nodecount];
ypositions = newfloat[nodecount];
velocities = newfloat[nodecount];
accelerations = newfloat[nodecount];
meshobjects = newGameObject[edgecount];
meshes = newMesh[edgecount];
colliders = newGameObject[edgecount];
baseheight = Top;
bottom = Bottom;
left = Left;
So now we have all our arrays, and we're holding on to our data.
Now to actually set the values of our arrays. We'll start with the nodes:
Here, we set all the y-positions to be at the top of the water, and
then incrementally add all the nodes side by side. Our velocities and
accelerations are zero initially, as the water is still.
We finish the loop by setting each node in our LineRenderer (Body) to their correct position.
Creating the Meshes
Here's where it gets tricky.
We have our line, but we don't have the water itself. And the way we
can make this is using Meshes. We'll start off by creating these:
1
2
3
for(inti = 0; i < edgecount; i++)
{
meshes[i] = newMesh();
Now, Meshes store a bunch of variables. The first variable is pretty simple: it contains all the vertices (or corners).
The diagram shows what we want our mesh segments to look like. For
the first segment, the vertices are highlighted. We want four in total.
Now, as you can see here, vertex 0 is the top-left, 1 is the top-right, 2 is the bottom-left, and 3 is the top-right. We'll need to remember that for later.
The second property that meshes need is UVs.
Meshes have textures, and the UVs choose which part of the textures we
want to grab. In this case, we just want the top-left, top-right,
bottom-left, and bottom-right corners of our texture.
1
2
3
4
5
Vector2[] UVs = newVector2[4];
UVs[0] = newVector2(0, 1);
UVs[1] = newVector2(1, 1);
UVs[2] = newVector2(0, 0);
UVs[3] = newVector2(1, 0);
Now we need those numbers from before again. Meshes are made up of
triangles, and we know that any quadrilateral can be made of two
triangles, so now we need to tell the mesh how it should draw those
triangles.
Look at the corners with the node order labelled. Triangle A connects nodes 0, 1 and 3; Triangle B connects nodes 3, 2 and 0. Therefore, we want to make an array that contains six integers, reflecting exactly that:
1
int[] tris = newint[6] { 0, 1, 3, 3, 2, 0 };
This creates our quadrilateral. Now we set the mesh values.
1
2
3
meshes[i].vertices = Vertices;
meshes[i].uv = UVs;
meshes[i].triangles = tris;
Now, we have our meshes, but we don't have Game Objects to render them in the scene. So we're going to create them from our watermesh prefab which contains a Mesh Renderer and Mesh Filter.
Here, we're making box colliders, giving them a name so they're a bit
tidier in the scene, and making them each children of the water manager
again. We set their position to be halfway between the nodes, set their
size, and add a WaterDetector class to them.
Now that we have our mesh, we need a function to update it as the water moves:
You might notice that this function just uses the code we wrote
before. The only difference is that this time we don't have to set the
tris and UVs, because these stay the same.
Our next task is to make the water itself work. We'll use FixedUpdate() to modify them all incrementally.
1
2
voidFixedUpdate()
{
Implementing the Physics
First, we're going to combine Hooke's Law with the Euler method to find the new positions, accelerations and velocities.
So, Hooke's Law is [Math Processing Error], where [Math Processing Error] is the force produced by a spring (remember, we're modelling the surface of the water as a row of springs), [Math Processing Error] is the spring constant, and [Math Processing Error] is the displacement. Our displacement is simply going to be the y-position of each node minus the base height of the nodes.
Next, we add a damping factor proportional to the velocity of the force to dampen the force.
The Euler method is simple; we just add the acceleration to the velocity and the velocity to the position, every frame.
Note: I just assumed the mass of each node was 1 here, but you'll want to use:
1
accelerations[i] = -force/mass;
if you want a different mass for your nodes.
Tip: For precise physics, we would use Verlet integration,
but because we're adding damping, we can only use the Euler method,
which is a lot quicker to calculate. Generally, though, the Euler method
will exponentially introduce kinetic energy from nowhere into your
physics system, so don't use it for anything precise.
Now we're going to create wave propagation. The following code is adapted from Michael Hoffman's tutorial.
Here, we create two arrays. For each node, we're going to check the
height of the previous node against the height of the current node and
put the difference into leftDeltas.
Then, we'll check the height of the subsequent node against the height of the node we're checking, and put that difference into rightDeltas. (We'll also multiply all values by a spread constant).
We can change the velocities based on the height difference
immediately, but we should only store the differences in positions at
this point. If we changed the position of the first node straight off
the bat, by the time we looked at the second node, the first node will
have already moved, so that'll ruin all our calculations.
01
02
03
04
05
06
07
08
09
10
11
for(inti = 0; i < xpositions.Length; i++)
{
if(i > 0)
{
ypositions[i-1] += leftDeltas[i];
}
if(i < xpositions.Length - 1)
{
ypositions[i + 1] += rightDeltas[i];
}
}
So once we've collected all our height data, we can apply it at the
end. We can't look to the right of the node at the far right, or to the
left of the node at the far left, hence the conditions i > 0 and i < xpositions.Length - 1.
Also, note that we contained this whole code in a loop, and ran it
eight times. This is because we want to run this process in small doses
multiple times, rather than one large calculation, which would be a lot
less fluid.
Adding Splashes
Now we have water that flows, and it shows. Next, we need to be able to disturb the water!
For this, let's add a function called Splash(), which
will check the x-position of the splash, and the velocity of whatever is
hitting it. It should be public so that we can call it from our
colliders later.
1
2
publicvoidSplash(floatxpos, floatvelocity)
{
First, we need to make sure that the specified position is actually within the bounds of our water:
We take the position of the splash relative to the position of the left edge of the water (xpos).
We divide this by the position of the right edge relative to the position of the left edge of the water.
This gives us a fraction that tells us where the splash is. For
instance, a splash three-quarters of the way along the body of water
would give a value of 0.75.
We multiply this by the number of edges and round this number, which gives us the node our splash was closest to.
1
velocities[index] = velocity;
Now we set the velocity of the object that hit our water to that node's velocity, so that it gets dragged down by the object.
Note: You could change this line to whatever suits
you. For instance, you could add the velocity to its current velocity,
or you could use momentum instead of velocity and divide by your node's
mass.
Now we want to make a particle system that'll produce the splash. We
defined that earlier; it's called "splash" (creatively enough). Be sure
not to confuse it with Splash(). The one I'll be using is included in the source files.
First, we want to set the parameters of the splash to change with the velocity of the object.
Here, we've taken our particles, set their lifetime so they won't die
shortly after they hit the surface of the water, and set their speed to
be based on the square of their velocity (plus a constant, for small
splashes).
You may be looking at that code and thinking, "Why has he set the startSpeed twice?", and you'd be right to wonder that. The problem is, we're using a particle system (Shuriken,
provided with the project) that has its start speed set to "random
between two constants". Unfortunately, we don't have much access over
Shuriken by scripts, so to get that behaviour to work we have to set the
value twice.
Now I'm going to add a line that you may or may not want to omit from your script:
1
2
Vector3 position = newVector3(xpositions[index],ypositions[index]-0.35f,5);
Shuriken particles won't be destroyed when they hit your objects, so
if you want to make sure they aren't going to land in front of your
objects, you can take two measures:
Stick them in the background. (You can tell this by the z-position being 5).
Tilt the particle system to always point towards the center of your
body of water—this way, the particles won't splash onto the land.
The second line of code takes the midpoint of the positions, moves
upwards a bit, and points the particle emitter towards it. I've included
this behaviour in the demo. If you're using a really wide body of
water, you probably don't want this behaviour. If your water is in a
small pool inside a room, you may well want to use it. So, feel free to
scrap that line about rotation.
Now, we make our splash, and tell it to die a little after the
particles are due to die. Why a little afterwards? Because our particle
system sends out a few sequential bursts of particles, so even though
the first batch only last till Time.time + lifetime, our final bursts will still be around a little after that.
Yes! We're finally done, right?
Collision Detection
Wrong! We need to detect our objects, or this was all for nothing!
Remember we added that script to all our colliders before? The one called WaterDetector?
Well we're going to make it now! We only want one function in it:
1
2
voidOnTriggerEnter2D(Collider2D Hit)
{
Using OnTriggerEnter2D(), we can specify what happens whenever a 2D Rigid Body enters our body of water. If we pass a parameter of Collider2D we can find more information about that object.
Now, all of our colliders are children of the water manager. So we just grab the Water component from their parent and call Splash(), from the position of the collider.
Remember again, I said you could either pass velocity or momentum, if
you wanted it to be more physically accurate? Well here's where you
have to pass the right one. If you multiply the object's y-velocity by
its mass, you'll have its momentum. If you just want to use its
velocity, get rid of the mass from that line.
Finally, you'll want to call SpawnWater() from somewhere. Let's do it at launch:
1
2
3
4
voidStart()
{
SpawnWater(-10,20,0,-10);
}
And now we're done! Now any rigidbody2D with a collider that hits the water will create a splash, and the waves will move correctly.
Advertisement
Bonus Exercise
As an extra bonus, I've added a few lines of code to the top of SpawnWater().
These lines of code will add a box collider to the water itself. You
can use this to make things float in your water, using what you've
learnt.
You'll want to make a function called OnTriggerStay2D() which takes a parameter of Collider2D Hit.
Then, you can use a modified version of the spring formula we used
before that checks the mass of the object, and add a force or velocity
to your rigidbody2D to make it float in the water.
Make a Splash
In this tutorial, we implemented a simple water simulation for use in
2D games with simple physics code and a line renderer, mesh renderers,
triggers and particles. Perhaps you will add wavy bodies of fluid water
as an obstacle to your next platformer, ready for your characters to
dive into or carefully cross with floating stepping stones, or maybe you
could use this in a sailing or windsurfing game, or even a game where
you simply skip rocks across the water from a sunny beach. Good luck!


0 comments: