Top 10 Internet tips and tricks

0 comments
You don't need the http:// portion of a web page
When typing an Internet address you do not need to type http:// or even www. in the address. For example, if you wanted to visit Computer Hope you could just type computerhope.com and press enter. To make things even quicker, if you're visiting a .com address you can type computerhope and then press Ctrl + Enter to type out the full http://www.computerhope.com address.
Quickly move between the fields of a web page
If you're filling out an online form, e-mail, or other text field you can quickly move between each of the fields by pressing the Tab key or Shift + Tab to move back a field. For example, if you're filling out your name and the next field is your e-mail address you can press the Tab key to switch to the e-mail field.
Tip: This tip also applies to the buttons, if you press tab and the web developer has designed correctly the button should be selected and will allow you to press the space bar or enter to push the button.
Tip: If you have a drop-down box that lists every country or every state you can click that box and then press the letter of the state or country you're looking for. For example, is a drop-down box of States in the United States you could press u on the keyboard to quickly scroll to Utah.
Use Internet search engines to their full potential
Make sure to get the most out of every search result. If you're not finding what you want try surrounding the text in quotes. For example, if you were searching for 'computer help' this actually searches for pages that contain both computer and help and not necessarily pages that have computer and help next to each other. If you search for "computer help" with the quotes around the search query this will only return pages that actually have computer and help next to each other.
Tip: Many new computer users also don't realize that in every search box you can press enter instead of having to move the mouse button over to the Search button.
Protect yourself and avoid bad web sites
Know your Internet browser shortcuts
There are dozens of different shortcut keys that can be used with Internet browsers. Below are a few of our top suggested Internet browser shortcuts.
- Pressing Alt + D in any major Internet browser will move the cursor into the address bar. This is a great way to quickly enter an Internet address without having to click the mouse cursor in the address bar.
- Hold down the Ctrl key and press the + or - to increase and decrease the size of text.
- Press the backspace key or hold down the Alt key + left arrow to go back a page.
- Press F5 to refresh or reload a web page.
- Press F11 to make the Internet browser screen full screen. Press F11 again to return back to the normal view.
- Press Ctrl + B to open your Internet bookmarks.
- Press Ctrl + F to open the find box in the browser to search for text within the web page you're looking at.
Take advantage of tabbed browsing
Take full advantage of tabbed browsing in all Internet browsers today. While reading any web page if you come across a link you may be interested in open that link in a new tab so it can be viewed later. A new tab can be opened by holding down the Ctrl key and clicking the link or if you have a mouse with a wheel click the link with the middle mouse button.
Try alternative browsers
Most computer users use the default browser that comes included with the computer, with Microsoft Windows this is Internet Explorer. There are several great alternative browsers that are all free to download and use and may have features your current browser does not include. Below are a few of our favorites, try one or try them all.
Install plugins and add-ons
Each of the above alternative browsers also have a large community of volunteers who develop add-ons and plugins that can be added into the browser. Each of these browsers have hundreds of thousands of these add-ons that can do such things as giving you live weather in your browser window, changing its color, and adding additional functionality.
Make sure your browser and its plugins are up-to-date
Each Internet browser can have several additional plugins that give it additional functionality. For example, Adobe Flash is a great way to bring movies and other animated content to the Internet. Keeping these plugins up-to-date is vital for your computer stability and also security. Using the below tool you can quickly verify if your plugins are up-to-date and get links to where to download the latest updates.
Use online services
There are hundreds of free online services that can help make using your computer easier, more productive, and more enjoyable. See our top 10 online services for a listing of our favorites.

Read More »

Configuring Windows firewall

0 comments
Configuring the firewall to allow certain programs to work through it is not always the best thing to do, because it will expose your computer more to the outside world and increase your risk of getting infected with something. However, in the short term or for an application that you must use, you can make it work through the firewall. In the original version of the firewall, the only possibility was to specify a port number to open. Now, it is much easier to make an application work though the firewall. Instead of typing in a port number, users can just select the program on their computer that they want to have accessed through the firewall.

This capability makes the firewall configuration much more user-friendly. Additionally, in Service Pack 2, Microsoft left in the old way to open up the firewall manually by entering in a port number, so that users still have total control if they really want it. The end result of these two methods is the same; the only difference is the ease of use for less experienced Windows XP users.

Using the new feature to open up holes in the firewall is pretty cool. Follow these steps to open up the firewall for a specific application:

1. Open up Network Connections again by clicking the Start Menu and selecting Run. Then, type firewall.cpl in the box and click OK.

2. When the Windows Firewall settings window loads, click the Exceptions tab.

3. You will see a list of all of the different exceptions that are currently enabled, as signified by the check in the box. By default, a few applications will be enabled. I recommend that you uncheck all of the entries unless you use them. If not, then you are just taking an unnecessary risk by leaving those doors open.

4. If you want to add an application to the exception list so that it will be able to accept connections and data from the outside world, such as an Instant Message program that wants to receive files from other users, just click the Add Program button.

5. Select the name of the program from the list or click the Browse button on the Add a Program window to select the executable of the application that you want to open to the world.

6. When you are finished selecting the program that you want to be able to access through the firewall, click OK and it will appear on the list.

7. Now that the program is on the list, just check the box next to the name to open up the firewall for the application.

8. Click OK to activate your new firewall settings.

Windows Firewall also includes settings on how you want your computer to respond when several different standard Internet messages are sent to it. For example, one setting you can specify is the ping command, which is a network command used to estimate turnaround time between sending data to a computer and receiving a response. All of these settings are found on the Advanced tab by clicking the Settings button under the ICMP section. The screen is pretty straightforward. If you want your computer to have a stealth presence on the Web, as I mentioned earlier, you should uncheck all of the entries listed on the ICMP tab.

Read More »

How to use pen drive as RAM

1 comments

4

Yes with some modified settings you can use your pen drive as a RAM

1) Connect your pen drive to your PC [pen drive should be at least 1 GB or if you having 4 GB then its better]

2) Allow PC what he is supposed to do,let system to detect pen drive.

3) After your PC finished with its detection work,you have to do some little

4) Right click on the My Computer and select the properties

5) Goto advanced and then performance setting then advanced then

6) Select pen drive and click on custom size " Check the value of space available "

7) Enter the same in the Initial and the Max columns

" You just used the memory of the PenDrive as a Virtual Memory "

8) Now restart your pc and enjoy your fast and super system

Read More »

Lock My Computer Desktop

0 comments


Create a Shortcut to Lock Your Computer

Leaving your computer in a hurry but you don’t want to log off? You can double-click a shortcut on your desktop to quickly lock the keyboard and display without using CTRL+ALT+DEL or a screensaver.

To create a shortcut on your desktop to lock your computer:

Right-click the desktop.
New and then click Shortcut.

The Create Shortcut Wizard opens. In the text box, type the following:
rundll32.exe user32.dll,LockWorkStation

Click Next.

Enter a name for the shortcut. You can call it "Lock Workstation" or choose any name you like.

Click Finish.

Read More »

Rename recycle Bin

0 comments


1. Start, Run, 'Regedit'.

2
. Press 'Ctrl'+'F' to open find box and type 'Recycle Bin' to search.

3
. Change any value data with 'Recycle Bin' to whatever name you want to give it ( ie, like 'Trash Can' or 'Dump' etc).

4
. Press F3 to continue searching for 'Recycle Bin' and change wherever you come across 'Recycle Bin' to new its new name.

5
. Repeat step 4 until you have finished with searching and changed all values to its new name.

6
. Close regedit and hit F5 on desktop to see the new name on screen.

Note: As a good practice, always backup your registry before changing anything although changing 'Recycle Bin' name is a simple tweak and doesnt affect anything else.

Read More »

Stop Windows Error Blue Screen

0 comments
Sometimes it just keeps happening over and over again and usually without any warning. Unfortunately when your computer shows up with a blue screen it will usually be set to automatically shutdown the computer or sometimes restart it. This makes many people panic because they cannot see, or even have time to write down all of the information on that particular blue screen.

Stop the Windows error blue screen on your screen and stopping it from restarting can be done in all Windows versions. I do not use Windows XP at the moment, however I am sure that this option exists in that operating system as well. The screen shots I have taken below are from Windows Vista, but Windows 7 is very similar to this.

How to stop the Windows error blue screen:
Follow this step:

1. Go to My Computer on Display and Right Click on My Computer Icon.

2. Click on Properties.

3. Now the systems properties will open. Click on Advanced Tab.

4. Under the Startup and Recovery section, press on settings.

5. The start up and recovery box will appear. Go to the System Failure section.

6. Uncheck the box where it says Automatically restart.

7. Press ok to finish.

Read More »

How to Log on to PC If You Forgot Windows 7 Password

0 comments


Windows Password could help people protect their important data that is stored in their computer. But many people are forgetful and easy to forget their password. So what should you do to log on to PC when you forgot Windows 7 password? show you 3 solutions.


Method 1
: Reset Windows 7 Password with Password Reset Disk

A strong password can be easily forgotten or lost, creating a password reset disk is necessary. If you forget Windows 7 password, you can use the password reset disk to reset the password. With it, you can easily reset your Windows 7 password and log on to your PC in a minute.

Creating a password reset disk in case of forgetting password is necessary. But there are still many people forget to create one in advance. So it is highly recommend that creating a password reset disk when you create your logon password.

Method 2: Reset Windows 7 Password with Third-party tool

In addition to reset Windows 7 password with password reset disk, you can also reset the forgotten password with third-party Windows password reset software. Windows password reset software allows you to reset forgotten Windows 7 password by creating a bootable CD/DVD or USB flash drive. Here we suggest Rekeysoft Windows Password Recovery.

Rekeysoft Windows Password Recovery is professional Windows password reset tool. It provides you fast and secure way to reset forgotten password in any versions of Windows, including Windows 7/Vista/XP etc. You only need to create a bootable CD/DVD or USB flash drive.

Method 3: Re-install Windows 7 Operating System

If you cannot log on to computer with the methods above, you can re-install Windows 7. It is the last choice for you. Insert the Windows 7 installation disc into your computer and restart it. Once the computer is running, follow the onscreen instructions to re-install Windows 7.

The methods above are effective for you when you forgot windows 7 password. And they can be also useful when you forgot Windows password of Windows Vista and Windows XP. You can choose one of them when you lost of forgot Windows 7 password.

Read More »

How to Create Partition in Windows 7

0 comments

1
. Click Windows icon and Click Control Panel
2. Click on System and Security.
3. Click on Administrative Tools.
4. Double Click on Computer Management.
5. Click on Disk Management.
6. Left Click on partition that you want to re-size (shrink or extend).
7. Want to shrink volume of disk 0 on "C" partition, so click shrink.
8. Enter the amount of space to shrink, windows 7 already give maximum size to shrink, so we can only reduce the size.
9. Click shrink.
10. Now we have unallocated disk space to create a partition, left click on unallocated disk space and click new simple volume.
11. Wizard for creating new simple volume will appear, just click next.
12. Type size of partition we want to create, and click next.
13. Assign drive letter for partition, and click next.
14. Choose format of partition (choose NTFS), and don't forget to choose "perform a quick format" to format partition quickly, and click next.
15. Click finish to complete creating partition, and new partition already create.

Read More »

Learn How To Diagnose Power Supply Problems

0 comments
he Power Supply convert's your regular household current into low DC voltage used by the computer. When this component fails,there is simply no activity going on wih your computer. Remember to do the easy troubleshooting first. Inspect the Power Supply for any damage. Double-Check all connections.

Learning how to check your power supply and how to replace it when needed can be a life saver if you're a computer buff or in business with the trusted PC. Don't take for granted the simple pleasure of turning on your PC and everything works just fine.

We turned on one of our computers recently and in about one hour,it just re-booted itself. And it continued doing so about 10 times a day until we found out the power supply was the culprit. Things to look for when your power supply is going bad or just dies on you are the following.

NO POWER TO THE COMPUTER

Here you must first check the wall outlet for power by connecting another device such as a radio or lamp to be sure power is present. If the computer is connected through a surge protector, check it as well.

If the wall out has power, check the power cable going to the PC to see if AC voltage is making its way to the system unit. Do this with the use of a multimeter.

If there is power,you will have to open the PC and check for power from the power supply to the motherboard.

When using a multimeter to check voltage,be sure you have a good ground for the black lead of the multimeter.

RE-BOOTING PROBLEMS

One main problem you may face with an ailing Power Supply is that it may re-boot the computer without any warning. All information is lost and it seems as though this happens at the worst possible time.

Booting errors when the computer first start's up is another indicator of this component going on the blink.

POWER DISTRIBUTION PROBLEMS

When the power supply begins to fail, you may receive power at one device and not another. For example, the Hard Drive may receive power but the CDROM Drive has nothing at all.

Another headache with would cause re-booting is the intermittent power going to the drives or the motherboard itself. Follow the steps below to check your power supply should you experience some of the above problems.

CHECKING THE POWER SUPPLY

If the wall outlet, and the power cord are good, make sure the connection at the motherboard is secure. Then you may have to face the fact that the power supply itself is bad. If you have a Multimeter you can test the power supply output before purchasing a new one. Simply follow these steps.

Turn off the PC, but do not unplug it,open the system unit. Set the multimeter to read DC volts in the next range higher than 12 volts. Locate a power connector similair to the hard drive, or cdrom drive connector that is unused and turn on the PC.

You can also unplug a drive connector and use it as well. Turn on the PC and insert the BLACK probe into the power connector on one of the BLACK wires.Touch the RED probe to the YELLOW wire on the power connector.

The multimeter reading should be +12 volts Now touch the RED probe to the RED wire and the reading should be +5 volts.If no readings or different readings occured, you'll have to replace the power supply. If the readings were correct, you should check the P8 or P9 connectors at the motherboard. These connectors may also be named P4 and P5. To check these connectors, perform the following...

Insert the BLACK probe into P8 at one of the BLACK wires. Insert the RED probe into the P8 connector at the RED wire. The reading on the multimeter should be +5 volts

Check the power going to the Motherboard connections by inserting the RED probe into P8 at the YELLOW wire and you should get +12 volts.Leave the BLACK wire touching the black wire at the P8 connector.Check the BLUE wire and the reading should be a -12 volts.

Now move the BLACK probe to the BLACK wire on the P9 connector. Test the WHITE wire by inserting the RED probe and the reading should be -5 volts. Check the RED wires on the P9 connector and you should get +5 volts on each red wire. You won't get exactly 5 or 12 volts but the readings will be very close, such as 5.02 volts.

If the Power Supply is a couple of volts off, in either direction, such as when the RED wire should be reading -5 volts but it reads -8 volts, or if there are no readings, replace the power supply.

DO NOT remove the power supply from the system unit case when performing these tests. DO NOT perform these tests if you do not feel comfortable. Be sure to remove any and all electrical static build-up from your clothes and body BEFORE touching any parts inside the system unit.And NEVER open the power supply case for any reason, since high voltage may be present.

Read More »

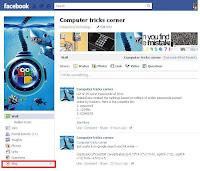
How to add your blog to your facebook page

0 comments


This post is about how you can add your blog to your facebook page using a facebook app called " networked blogs ". Networked blog is a facebook app which is used by many blogger's to permote there blog at facebook. When you will add your blog to your fan page using networked blog it will automatically shared in you page under your Blog tab.
Now how you can add your blog to your facebook page:-
  • After clicking on " Register a Blog " This window will open now copy your blog link and paste it in the box .
  • Now fill all the required information

    After filling all the required info click on:- Next
  • After clicking next you will be asked whether you author of the blog or not? click on YES
  • Then you will be asked for confirmation (confirmation for that you are the owner of blog or website)for confirmation you have two options click on 2nd option . 
    • Ask friends to confirm you( instruction about 1st option mentioned in video at bottom of this post)
    • Or, install the widget ( CLICK ON THIS OPTION, RECOMMENDED,EASY TO FOLLOW )
Click on:- Or, install the widget
  • Copy the Option 1 code then login to you blog if not already->goto layout->add a gadget->html. and paste code->save arragements   

  • Now come back to Networked blog window and click on Verify Now


  • Now goto your FACEBOOK FAN PAGE where you added the BLOG and click on Blog->Edit tab->and tick your blog->click on save changes
How to add you blog to facebook page:-

Read More »