In
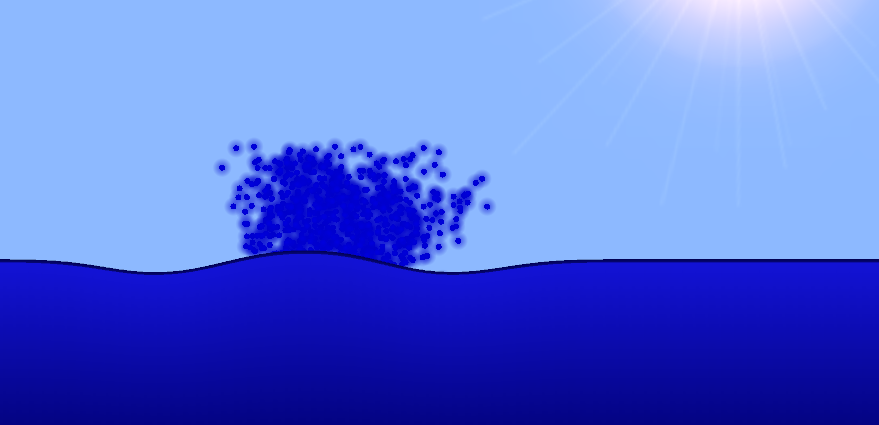
this tutorial, we're going to simulate a dynamic 2D body of water using
simple physics. We will use a mixture of a line renderer, mesh
renderers, triggers and particles to create our effect. The final result
comes complete with waves and splashes, ready to add to your next game.
A Unity (Unity3D) demo source is included, but you should be able to
implement something similar using the same principles in any game
engine.
Here's what we're going to end up with. You'll need the Unity browser plugin to try it out. Click to create a new object to drop into the water.
Setting Up Our Water Manager
In his tutorial, Michael Hoffman demonstrated how we can model the surface of water with a row of springs.
We're going to render the top of our water using one of Unity's line
renderers, and use so many nodes that it appears as a continuous wave.
We'll have to keep track of the positions, velocities and
accelerations of every node, though. To do that, we're going to use
arrays. So at the top of our class we'll add these variables:
1
2
3
4
5
float[] xpositions;
float[] ypositions;
float[] velocities;
float[] accelerations;
LineRenderer Body;
The LineRenderer will store all our nodes and outline our body of water. We still need the water itself, though; we'll create this with Meshes. We're going to need objects to hold these meshes too.
1
2
GameObject[] meshobjects;
Mesh[] meshes;
We're also going to need colliders so that things can interact with our water:
1
GameObject[] colliders;
And we'll store all our constants as well:
1
2
3
4
constfloatspringconstant = 0.02f;
constfloatdamping = 0.04f;
constfloatspread = 0.05f;
constfloatz = -1f;
These constants are the same kind as Michael discussed, with the exception of z—this is our z-offset for our water. We're going to use -1
for this so that it gets displayed in front of our objects. (You might
want to change this depending on what you want to appear in front and
behind of it; you're going to have to use the z-coordinate to determine
where sprites sit relative to it.)
Next, we're going to hold onto some values:
1
2
3
floatbaseheight;
floatleft;
floatbottom;
These are just the dimensions of the water.
We're going to need some public variables we can set in the editor,
too. First, the particle system we're going to use for our splashes:
1
publicGameObject splash:
Next, the material we'll use for our line renderer (in case you want
to reuse the script for acid, lava, chemicals, or anything else):
1
publicMaterial mat:
Plus, the kind of mesh we're going to use for the main body of water:
1
publicGameObject watermesh:
These are all going to be based on prefabs, which are all included in the source files.
We want a game object that can hold all of this data, act as a
manager, and spawn our body of water ingame to specification. To do
that, we'll write a function called SpawnWater().
This function will take inputs of the left side, the width, the top, and the bottom of the body of water.
(Though this seems inconsistent, it acts in the interest of quick level design when building from left to right).
Creating the Nodes
Now we're going to find out how many nodes we need:
1
2
intedgecount = Mathf.RoundToInt(Width) * 5;
intnodecount = edgecount + 1;
We're going to use five per unit width, to give us smooth motion that
isn't too demanding. (You can vary this to balance efficiency against
smoothness.) This gives us all our lines, then we need the + 1 for the extra node on the end.
The first thing we're going to do is render our body of water with the LineRenderer component:
1
2
3
4
5
Body = gameObject.AddComponent<LineRenderer>();
Body.material = mat;
Body.material.renderQueue = 1000;
Body.SetVertexCount(nodecount);
Body.SetWidth(0.1f, 0.1f);
What we've also done here is select our material, and set it to
render above the water by choosing its position in the render queue.
We've set the correct number of nodes, and set the width of the line to 0.1.
You can vary this depending on how thick you want your line. You may have noticed that SetWidth() takes two parameters; these are the width at the start and the end of the line. We want that width to be constant.
Now that we've made our nodes, we'll initialise all our top variables:
01
02
03
04
05
06
07
08
09
10
11
12
xpositions = newfloat[nodecount];
ypositions = newfloat[nodecount];
velocities = newfloat[nodecount];
accelerations = newfloat[nodecount];
meshobjects = newGameObject[edgecount];
meshes = newMesh[edgecount];
colliders = newGameObject[edgecount];
baseheight = Top;
bottom = Bottom;
left = Left;
So now we have all our arrays, and we're holding on to our data.
Now to actually set the values of our arrays. We'll start with the nodes:
Here, we set all the y-positions to be at the top of the water, and
then incrementally add all the nodes side by side. Our velocities and
accelerations are zero initially, as the water is still.
We finish the loop by setting each node in our LineRenderer (Body) to their correct position.
Creating the Meshes
Here's where it gets tricky.
We have our line, but we don't have the water itself. And the way we
can make this is using Meshes. We'll start off by creating these:
1
2
3
for(inti = 0; i < edgecount; i++)
{
meshes[i] = newMesh();
Now, Meshes store a bunch of variables. The first variable is pretty simple: it contains all the vertices (or corners).
The diagram shows what we want our mesh segments to look like. For
the first segment, the vertices are highlighted. We want four in total.
Now, as you can see here, vertex 0 is the top-left, 1 is the top-right, 2 is the bottom-left, and 3 is the top-right. We'll need to remember that for later.
The second property that meshes need is UVs.
Meshes have textures, and the UVs choose which part of the textures we
want to grab. In this case, we just want the top-left, top-right,
bottom-left, and bottom-right corners of our texture.
1
2
3
4
5
Vector2[] UVs = newVector2[4];
UVs[0] = newVector2(0, 1);
UVs[1] = newVector2(1, 1);
UVs[2] = newVector2(0, 0);
UVs[3] = newVector2(1, 0);
Now we need those numbers from before again. Meshes are made up of
triangles, and we know that any quadrilateral can be made of two
triangles, so now we need to tell the mesh how it should draw those
triangles.
Look at the corners with the node order labelled. Triangle A connects nodes 0, 1 and 3; Triangle B connects nodes 3, 2 and 0. Therefore, we want to make an array that contains six integers, reflecting exactly that:
1
int[] tris = newint[6] { 0, 1, 3, 3, 2, 0 };
This creates our quadrilateral. Now we set the mesh values.
1
2
3
meshes[i].vertices = Vertices;
meshes[i].uv = UVs;
meshes[i].triangles = tris;
Now, we have our meshes, but we don't have Game Objects to render them in the scene. So we're going to create them from our watermesh prefab which contains a Mesh Renderer and Mesh Filter.
Here, we're making box colliders, giving them a name so they're a bit
tidier in the scene, and making them each children of the water manager
again. We set their position to be halfway between the nodes, set their
size, and add a WaterDetector class to them.
Now that we have our mesh, we need a function to update it as the water moves:
You might notice that this function just uses the code we wrote
before. The only difference is that this time we don't have to set the
tris and UVs, because these stay the same.
Our next task is to make the water itself work. We'll use FixedUpdate() to modify them all incrementally.
1
2
voidFixedUpdate()
{
Implementing the Physics
First, we're going to combine Hooke's Law with the Euler method to find the new positions, accelerations and velocities.
So, Hooke's Law is [Math Processing Error], where [Math Processing Error] is the force produced by a spring (remember, we're modelling the surface of the water as a row of springs), [Math Processing Error] is the spring constant, and [Math Processing Error] is the displacement. Our displacement is simply going to be the y-position of each node minus the base height of the nodes.
Next, we add a damping factor proportional to the velocity of the force to dampen the force.
The Euler method is simple; we just add the acceleration to the velocity and the velocity to the position, every frame.
Note: I just assumed the mass of each node was 1 here, but you'll want to use:
1
accelerations[i] = -force/mass;
if you want a different mass for your nodes.
Tip: For precise physics, we would use Verlet integration,
but because we're adding damping, we can only use the Euler method,
which is a lot quicker to calculate. Generally, though, the Euler method
will exponentially introduce kinetic energy from nowhere into your
physics system, so don't use it for anything precise.
Now we're going to create wave propagation. The following code is adapted from Michael Hoffman's tutorial.
Here, we create two arrays. For each node, we're going to check the
height of the previous node against the height of the current node and
put the difference into leftDeltas.
Then, we'll check the height of the subsequent node against the height of the node we're checking, and put that difference into rightDeltas. (We'll also multiply all values by a spread constant).
We can change the velocities based on the height difference
immediately, but we should only store the differences in positions at
this point. If we changed the position of the first node straight off
the bat, by the time we looked at the second node, the first node will
have already moved, so that'll ruin all our calculations.
01
02
03
04
05
06
07
08
09
10
11
for(inti = 0; i < xpositions.Length; i++)
{
if(i > 0)
{
ypositions[i-1] += leftDeltas[i];
}
if(i < xpositions.Length - 1)
{
ypositions[i + 1] += rightDeltas[i];
}
}
So once we've collected all our height data, we can apply it at the
end. We can't look to the right of the node at the far right, or to the
left of the node at the far left, hence the conditions i > 0 and i < xpositions.Length - 1.
Also, note that we contained this whole code in a loop, and ran it
eight times. This is because we want to run this process in small doses
multiple times, rather than one large calculation, which would be a lot
less fluid.
Adding Splashes
Now we have water that flows, and it shows. Next, we need to be able to disturb the water!
For this, let's add a function called Splash(), which
will check the x-position of the splash, and the velocity of whatever is
hitting it. It should be public so that we can call it from our
colliders later.
1
2
publicvoidSplash(floatxpos, floatvelocity)
{
First, we need to make sure that the specified position is actually within the bounds of our water:
We take the position of the splash relative to the position of the left edge of the water (xpos).
We divide this by the position of the right edge relative to the position of the left edge of the water.
This gives us a fraction that tells us where the splash is. For
instance, a splash three-quarters of the way along the body of water
would give a value of 0.75.
We multiply this by the number of edges and round this number, which gives us the node our splash was closest to.
1
velocities[index] = velocity;
Now we set the velocity of the object that hit our water to that node's velocity, so that it gets dragged down by the object.
Note: You could change this line to whatever suits
you. For instance, you could add the velocity to its current velocity,
or you could use momentum instead of velocity and divide by your node's
mass.
Now we want to make a particle system that'll produce the splash. We
defined that earlier; it's called "splash" (creatively enough). Be sure
not to confuse it with Splash(). The one I'll be using is included in the source files.
First, we want to set the parameters of the splash to change with the velocity of the object.
Here, we've taken our particles, set their lifetime so they won't die
shortly after they hit the surface of the water, and set their speed to
be based on the square of their velocity (plus a constant, for small
splashes).
You may be looking at that code and thinking, "Why has he set the startSpeed twice?", and you'd be right to wonder that. The problem is, we're using a particle system (Shuriken,
provided with the project) that has its start speed set to "random
between two constants". Unfortunately, we don't have much access over
Shuriken by scripts, so to get that behaviour to work we have to set the
value twice.
Now I'm going to add a line that you may or may not want to omit from your script:
1
2
Vector3 position = newVector3(xpositions[index],ypositions[index]-0.35f,5);
Shuriken particles won't be destroyed when they hit your objects, so
if you want to make sure they aren't going to land in front of your
objects, you can take two measures:
Stick them in the background. (You can tell this by the z-position being 5).
Tilt the particle system to always point towards the center of your
body of water—this way, the particles won't splash onto the land.
The second line of code takes the midpoint of the positions, moves
upwards a bit, and points the particle emitter towards it. I've included
this behaviour in the demo. If you're using a really wide body of
water, you probably don't want this behaviour. If your water is in a
small pool inside a room, you may well want to use it. So, feel free to
scrap that line about rotation.
Now, we make our splash, and tell it to die a little after the
particles are due to die. Why a little afterwards? Because our particle
system sends out a few sequential bursts of particles, so even though
the first batch only last till Time.time + lifetime, our final bursts will still be around a little after that.
Yes! We're finally done, right?
Collision Detection
Wrong! We need to detect our objects, or this was all for nothing!
Remember we added that script to all our colliders before? The one called WaterDetector?
Well we're going to make it now! We only want one function in it:
1
2
voidOnTriggerEnter2D(Collider2D Hit)
{
Using OnTriggerEnter2D(), we can specify what happens whenever a 2D Rigid Body enters our body of water. If we pass a parameter of Collider2D we can find more information about that object.
Now, all of our colliders are children of the water manager. So we just grab the Water component from their parent and call Splash(), from the position of the collider.
Remember again, I said you could either pass velocity or momentum, if
you wanted it to be more physically accurate? Well here's where you
have to pass the right one. If you multiply the object's y-velocity by
its mass, you'll have its momentum. If you just want to use its
velocity, get rid of the mass from that line.
Finally, you'll want to call SpawnWater() from somewhere. Let's do it at launch:
1
2
3
4
voidStart()
{
SpawnWater(-10,20,0,-10);
}
And now we're done! Now any rigidbody2D with a collider that hits the water will create a splash, and the waves will move correctly.
Advertisement
Bonus Exercise
As an extra bonus, I've added a few lines of code to the top of SpawnWater().
These lines of code will add a box collider to the water itself. You
can use this to make things float in your water, using what you've
learnt.
You'll want to make a function called OnTriggerStay2D() which takes a parameter of Collider2D Hit.
Then, you can use a modified version of the spring formula we used
before that checks the mass of the object, and add a force or velocity
to your rigidbody2D to make it float in the water.
Make a Splash
In this tutorial, we implemented a simple water simulation for use in
2D games with simple physics code and a line renderer, mesh renderers,
triggers and particles. Perhaps you will add wavy bodies of fluid water
as an obstacle to your next platformer, ready for your characters to
dive into or carefully cross with floating stepping stones, or maybe you
could use this in a sailing or windsurfing game, or even a game where
you simply skip rocks across the water from a sunny beach. Good luck!
The world is on the brink of being uprooted by a megalomaniac
hell-bent on destruction. You and your band of merry followers are the
only group able to stop him. What better time to head on down to the
stables and breed exotic birds? Or not...
At their best, mini-games offer players a meaningful way to test
their skills in an alternative game setting. At worst, they're either
incomplete or make little sense within the game's context. Before
peppering your next RPG with mini-games, it is imperative that you
consider their purpose, immersion factor and development time. Oh, and
don't forget: they should also be fun.
What Is a Mini-Game?
What better way to start off a piece on mini-games than by defining
exactly what a mini-game is? Unfortunately, that's not as simple as it
might initially sound. Mini-games vary widely in scope, in relevance,
and in how much they deviate from a game's core mechanics.
Compounding matters further, the line between a mini-game and an
essential feature can sometimes be blurred. For instance, if I asked two
World of Warcraft players, one who only raids and one who PvPs (that
is, takes part in player vs player combat) exclusively, whether the PvP
arena is a mini-game or an integral feature, I'd probably receive two
completely different answers.
With that in mind, it may be best to group mini-game types—or perceived types—into categories first. Without further ado:
A Game Within a Game
Protagonists have hobbies too. Mini-games of this nature, for lack of
a better term, give our hero something to do. The carnival games in
Chrono Trigger and the simultaneously revered and loathed Blitzball from
Final Fantasy X come to mind. Chrono Trigger defied tradition by introducing mini-games first, and combat later.These types of mini-games have several things in common:
They have minimal implications on the story as a whole.
Mastering the mini-game will have little to no bearing on your ability to beat the game.
Players are typically only required to play this type of mini-game once, if at all.
By winning or playing well, players are rewarded with inventory items, gold or other incremental upgrades.
They're designed to be a fun diversion.
Mini-games of this nature were exceedingly popular in the late 1990s
and early 2000s, but have since fallen slightly out of favor. That said,
there have been a slew of non-RPG releases that consist solely of
mini-games—think Mario Party.
Test Your Mettle
You've defeated hundreds of fledgling pigs and forest imps, traversed
the Volcano of Doom and crafted your first legendary quiver. Your feats
have gone noticed by the powers-that-be and they have invited you to
participate in arena combat.
Some mini-games will test the skills you've learned thus far. Whether
it be in battle or otherwise, RPGs, particularly more modern ones, will
often provide players with the option to utilize their newly honed
skills in alternative formats.
Commonalities include:
They generally have little impact on progression. However, in some cases they may be required to advance the story.
Winning requires the same proficiency as game progression does.
The rewards for winning are usually material or status-worthy in
nature, while losing can result in loss of status, injury, or death.
Examples include the Jar of Souls event in Diablo III, and World of
Warcraft's PvP arena. A solid non-combat example would be a quiz that
relies on your knowledge of the game world. Jar of Souls: Not as foreboding as it initially looks.
Win or Stay Put
And then there are mini-games that require successful completion.
Failure to do so usually results in, well... absolutely nothing at all.
Remember the Phantom Train from FFVI? In order to progress, players
must flip the appropriate switches. Other examples include deciphering
riddles and solving logic or spatial puzzles.
Common characteristics include:
Generally speaking, the only penalty for failure is stunted
progression. However, there are exceptions. For instance, you may be
tasked with solving a puzzle before gaining entry to an underground
treasure cove. In this case, you can still progress without "beating"
the mini-game, although you'd be missing out on that new broadsword.
Likewise, the reward for winning is usually continued progression.
Mini-games of this nature rely more on trial-and-error, creative
thinking, and other secondary skills than they do fighting ability.
"Win or stay put" mini-games are typically integrated into the main plot.
I know its hard to believe (not really), but some game developers are
sadistic. Instead of merely denying you passage for flipping the wrong
switch, they'll kill you off! I'd only advocate going this route if the
mini-game itself isn't exceedingly complicated and the player is either
provided with or can find clues regarding its answer.
Win or Suffer the Consequences
"Win or suffer the consequences" mini-games are very similar to "win
or stay put" mini-games, with the only exceptions being increased
complexity and that failure can result in game-ending ramifications.
Often, mini-games of the "win or suffer the consequences" variety eat
up elongated sections of the game. It is here where the proverbial line
in the sand between what is a mini-game and what is an essential
gameplay feature begins to blur. But for our purposes, we'll dive right
in, and treat these sequences as "not-so-mini" mini-games. Our logic
being that because these sequences deviate from the RPG staples of
grinding and exploration, they are in some ways a different game. Modern
Western RPGs incorporate multiple sequences of this type.
I'll leave the discussion of whether or not extended gameplay
deviations are core attributes or mini-games up to you. But, either way,
incorporating them requires a disciplined, well-thought out design
schema. Which segues nicely into our next topic:
Mini-Game Design Tips
The good news is that each aforementioned type of mini-game can add
extra layers of depth to an otherwise by-the-numbers RPG. But before you
commit yourself to building a sprawling arena or judiciary
establishment, it's imperative to first consider the impact mini-games
will have on your development cycle.
With that in mind, let's kick things off with a few general guidelines before diving into mini-game type specific tips:
Mini-Games Are Games Too!
First and foremost, mini-games are just that: games. Painfully
obvious, I know, but you'd be surprised at how many developers view them
as mere novelties.
Alright, so why is this important? Remember the massage mini-game
from Final Fantasy X-2—that's why. But, more specifically, mini-games
that aren't given the attention they deserve inevitably detract from the
overall gaming experience. And that's just bad news. Oh please, no!To counter this, treat each mini-game as an individual game,
subjecting to the same pre-production, production and post-production
standards that you would your main game. Going further, it's vital that
your game at least makes sense within the game's context; more on that
later.
Cost Considerations
As an independent developer, you're probably on a rather modest
budget. RPGs, regardless of whether they're a 16-bit homage or an open
world sandbox, are massive undertakings. Just the balancing process alone
has set teams back months, if not years. That said, you must carefully
consider the risk-reward ratio of introducing any new feature into your
RPG: side-quests and mini-games especially. This will require making
some difficult managerial decisions.
To make your task easier, start off by asking yourself: "Can I really
afford to design, allocate resources to, code, and polish my idea for a
mini-game?" If the answer is "no" or "maybe," either reevaluate the
mini-game's scope, replace it with a mini-game that your team can
handle, or ditch it entirely.
And if, at any point, you find yourself over-budget or late and
forced to make cuts, mini-games should be one of the first features to
go. It's for this reason that I suggest waiting until near the end of
your development cycle to implement them. That's not to say they
shouldn't be planned for in advance, but your core functionality should
always take precedence.
A Game Within a Game: Tacked on Mini-Games Are Tacky
Mini-games don't have to be meaningful or intimately tied to the
gaming world, but they should at least make sense in the game's context.
I recall reviewing a pay-to-win MMORPG that took place in a
high-fantasy setting, reminiscent of the Harry Potter movies. Players
gained access to a myriad of summoning spells and direct casts, growing
more powerful with every level. Standard fare, really.
But there was one peculiarity. In order to quickly restore your
magical energy, you would head down to the Fairgrounds and play an
unpolished, feature-light version of either Tetris Attacks, Dig Dug or
Concentration. The experience was laborious and disjointing. Even worse,
early in the game it was really the only viable way to replenish your
valuable resources. By scoring an inordinate amount of points you could
win other prizes, but the time investment was hardly worth the reward.
This MMORPG broke nearly every rule on how to make "a game within a game." But you won't do the same.
Always keep your game world and protagonist in mind before designing a
single mini-games. For instance, if your Hero is a burly ex-Marine with
a sword for his left arm, would he really be interested in playing
beach volleyball? Would the residents of a game like Fallout 3 pass the
time playing video games, despite the lack of electricity? Would a
Wizard replenish his magical energy playing Dig Dug? Clearly not. Yes, because this makes sense in a game about wizardry.However, an underground casino would make total sense in a
post-apocalyptic setting, as would a holographic card game in a science
fiction game. The point is, mini-games don't have to necessarily utilize
the same mechanics as the game itself, as long as they make sense
within its context.
Other general rules to follow when designing a "game within a game" include:
Requirements: Players should never be forced to master a
mini-game of this variety. At most, force them to try it out exactly
once. If they enjoy it, great; let them play it to their hearts'
content.
Rewards: Give players a reason to master a mini-game by
gifting them with rewards. Limit the rewards chart to incremental
upgrades and items that can be won via other means. If the rewards prove
too powerful or are otherwise inaccessible, players who don't enjoy
mini-games will be placed at a severe disadvantage. In a worst case
scenario, this will unbalance your entire game.
Originality: Use other mini-games for inspiration, but
don't rip them off. If gamers wanted to play Tetris, they can play the
original version or one of its many variants. Instead, give players a
specific reason to play your mini-games.
Polish: If your mini-game is broken, buggy, or otherwise
lacking compared to the rest of your game, players will notice. As I
mentioned before: If you can't do it right, it's better not to do it at
all.
Do note that more ambitious mini-games of this assortment will add
serious time and costs to your development cycle, and should be avoided
if you're on a strict budget.
A Note on When Requiring Players to Play "A Game Within a Game" Is Acceptable
There's only one set of circumstances where I would advocate players being forced to play a "game within a game":
The mini-game doubles as a skill. For instance, if picking locks
increases your in-game ability to pick more difficult locks, the art of
lock picking is just as much a skill than it is a mini-game. Skyrim's
implementation of lock picking is an excellent example of this.
The user is given more than one means of completing the task. For
example, a player approaches a locked door. He should be given the
option to either pick the lock, use his knowledge of explosives to blow
up the door, or use sheer brute force to knock it down, depending on his
preferred playing style and unique skill set. Thus, instead of
requiring players to play a mini-game, you're only asking them to play
one of many mini-games.
Players cannot proceed unless the mini-game is successfully complete.
Modern lock picking at its finest.
Test Your Mettle: To Arms!
Ah, the mini-game that tests just how good you really are. The main
advantage of this type of mini-game is that you won't have to introduce
any new gameplay mechanics, as they already rely on existing ones.
However, because they generally take place in alternative formats, they
may require additional art and music assets and game logic tweaks.
Still, that's better than reinventing the wheel.
The other beauty of "test your mettle" mini-games is that they can be
essential or nonessential, have severe penalties or none at all; the
choice is really up to you. However, I would suggest that any imposed
penalty match the context. Case in point: if you've become the top arena
fighter in the entire galaxy and are challenged by the former
undisputed champion, you should probably fight to the death. Barbaric I
know, but it makes sense.
Not all "test your mettle" mini-games need to be combat-based. You
may implement a sequence where you must travel from one end of the world
to another in an allotted amount of time, using your prior knowledge of
the world to help you succeed. Or you may be tasked with relying on
your skills of persuasion to talk yourself out of a sticky situation.
Whatever the task, try to adhere to the following:
Difficulty scaling: Arena battles should become more difficult, and losing should eventually bear dire consequences—even death.
Rewards: Without rewards, there is little reason to
participate in a challenge. Sometimes the reward will be that you
survive, but if the mini-game is optional, players must be given some
sort of incentive for winning.
Same but different: Force players to employ slightly
different tactics than they would otherwise. PvP in WoW relies on
evasion and defense more than it does on pure DPS. By challenging
players to experiment with new builds and techniques, your game gains
enormous value, all at little cost to the development team.
Win or Stay Put: When Mini-Games Stop Being Fun, and Start Becoming Chores
"Win or stay put" mini-games offer a slew of advantages. They're
relatively simple to implement, and thus cost effective. They also do a
nice job of breaking up the combat/exploration cycle typically
associated with most RPGs. Alright, so they might be a little gimmicky,
but that's OK, as long as they're well-designed and challenge players to
use a secondary skill set. It also helps if they're not painfully
boring.
If you were a fan of Final Fantasy VI, you may recall the Zozo clock
puzzle. Simultaneously exhilarating and brilliant, players would receive
clues from various NPCs regarding the time on a clock—only, the town
was comprised of a bunch of liars. Thus the only way to figure out the
right time was by eliminating all the wrong times. Compounding matters,
the NPCs made no reference to the minute hand. In order to solve that
piece of the puzzle, players were tasked with examining another clock.
Thankfully, you're given just enough clues to deduce how to solve the
puzzle. What time is it again?And that's the difference between a frustrating "win or stay put" mini-game and a well-designed one: clues.
Without them, more difficult puzzles will require an extraordinary
amount of trial and error, ultimately becoming a bore. Now, that's not
to say the clues need to be blatantly obvious, but they should exist.
If you're on a budget, consider relying on the same "win or stay put"
mini-game more than once. If you choose to do so, keep these other
handy tips in mind:
Learning curve: Mini-games need a learning curve too. Let
the first instance of a mini-game act as a sort of integrated tutorial,
and ramp up the difficulty accordingly.
Required or optional: Most mini-games of this variety must
be successfully completed in order to progress the plot. However,
there's no reason not to weave in a couple of optional variants. Make
the optional ones the hardest in the game, and reward players who
conquer them with access to a treasure room or other special treat.
Fun factor: Pressing switches can be a chore, especially if
you're fighting enemies in between. Counter this by thinking outside of
the box. For example, a riddle, combat puzzle or timed maze might prove
more interesting to players than lighting torches in a particular
order. And if you do decide to go a more traditional route, make sure
the payoff is worthwhile.
Win or Suffer the Consequences: Awesomely Ambitious
Undoubtedly the most time consuming and costly mini-games to
implement, the major benefit of "win or suffer the consequences"
mini-games are that they are truly awesome. Take the murder mystery
investigation scene from Star Wars: Knight of the Old Republic, for
example. For upwards of two hours of game time, players are asked to put
away their lightsaber and do some old-school detective work. Requiring
an entirely different set of skills, force persuasion withstanding, this
sequence acts as a refreshing change from the norm of fighting enemies,
exploring new lands, and acquiring skills. I'd argue that the game as a
whole benefits from it. The infamous KOTOR murder mystery investigation. Whodunit?Better yet, there are long-standing consequences to your actions.
Without giving too much away, you'll be given the option to go against
the evidence. Doing so results in a whole slew of Dark Side points.
Not for the faint of heart (and light of wallet), "win or suffer the
consequences" mini-games require a delicate juxtaposition of novelty,
fun and context. Whereas side quests are optional and typically
incorporate core game mechanics, "win or suffer the consequences"
sequences are complete deviations from everything you've experienced
thus far. Design them with care, and playtest the heck out of them.
Most importantly, gauge the risk involved. The last thing you want is
to increase your budget and development time by 20% just to incorporate
an alternative plot device that players abhor.
On a personal note, one of the games I'm working on—Hiro Fodder: A Blue Hope—incorporates
one of these sequences. Our little blue slime undertakes a heroic
journey to infiltrate the human city. Doing so requires him to find
expose secret passageways, uncover clues and spy on guards without
appearing in their field of vision. It's terrific fun, but, admittedly a
gigantic risk.
Conclusion
Let's look at an overview of the cost-to-value ratios of the different mini-game types:
Game within a game: High expense and production time; value to gamer varies.
As a skill, a game within a game's value increases.
Test your mettle: Low expense and production time; moderate value.
Win or stay put: Lower cost and production time; low to moderate value.
Win or suffer the consequences: Mid to very high cost and production times; high value.
By providing context to your larger mini-games, and fun to your
purposely divergent ones, you can add depth, replay value and additional
layers to your RPG. Just be aware of what you're getting into before
entering production, and always keep your time and budgetary restraints
in mind.
In this tutorial, we'll take an in-depth look at restoring an old
torn photograph. Restoring old family photos is something that you can
do for your relatives and bring tears to their eyes, and yes this is a
service you can offer to clients as well. Let's take a look at a
professional workflow for restoring old photographs to their former
glory.
1. Introduction
When deciding on which picture to use for this tutorial, I
encountered the lack of material I could use in public. The picture
provided is a family photo sent to me in a terrible scan resolution. But
the picture was just the kind of picture I found right for this kind of
tutorial. And the end result also shows that you actually can work on
poor scanned pictures and get reasonably good results. The print size is of course limited due to this. That said. The
importance with this tutorial is guiding you through the workflow
process. There are some important steps, however, you must keep in mind,
but never hesitate to be creative and explore different approaches. The
steps to follow are:
Make a copy of the original to work from
Adjust the dimension you need and crop the image so you don't work on areas you don't need.
Retouch/restore areas in the image as needed.
Remove noise or unwanted patterns
Adjust highlights shadows and neutrals (in color photos you would also adjust skin color)
Adjust the brightness and contrast
Sharpen
Step 1
And now for the workflow and tutorial. In Step 1 I have already
specified dimensions and cropped the image. You would then go about the
restoration. I always start out in photos like this with the patch tool
and get larger areas roughly patched. Then I get more specific and
change between the Patch Tool, the Healing Tool, and the Clone Tool as
suited. I'll explain in more detail in the next steps.
Step 2
The Patch Tool works just as the Marquee Tool in regards to behavior.
You drag a selection around the area you want to fix, then you click in
the middle of your selection, and whilst holding the mouse button down,
you drag the selection to another location in the picture with
similarities and let go. Be sure to align your selection before you let
it go. See next step and watch the alignment.
Step 3
Watch alignment in the shades of the curtain in the background. Do
all larger areas in the picture. This tool not only works great, but
it's also a timesaver and a good way to start your restoration.
Step 4
After getting all the larger areas done change to the Healing Brush
Tool (see corresponding red color in the picture below) and Clone Stamp
Tool. As you work on your picture always feel free to experiment with
these tools. If you are concerned with an efficient workflow, it's good
to get the grasp of these three tools. Note that the Spot Healing Tool is also a tool you would use where,
as its name suggests, there are spots. It works by just clicking on the
spots you want to remove and I find myself using this often in some
pictures where there are spots scattered around in the image. The
workflow would then be to start out with the Spot Healing Brush, then
changing between this and the Healing Brush Tool. In this picture, I had
no need for it though. As the picture below suggest, I use the Clone Stamp Tool at the edges
of the picture. The Healing Brush Tool and the Patch Tool will usually
create some effects you don't want when you work towards the edges of a
picture. Just try it out and you'll see what I mean. Again, just change
between the tools and feel free to experiment between them until you get
your desired result.
Step 5
Here we have done the first part of the restoration.
Step 6
And now for the serious defections in our picture. Here we’ll use the
man’s right eye to substitute his missing left eye. Just draw a rough
marquee selection around his right eye, and then hit Command + J to jump
the layer (copy the selection to a new layer).
Step 7
Then hit Command + T to enter the Free Transform Tool.
Step 8
Right-click inside the selection and hit Flip Horizontal.
Step 9
At this point, when you drag the selection over to where the left eye
should be, you would want to lower the Opacity and align the eye with
what's left of his torn away eye behind your new layer. When you have it
aligned, hit enter or hit the mark I've placed the green circle around
(shown below) to commit the changes. Then raise the Opacity to 100%
again.
Step 10
Now, with the layer selected hit the mask-button (as indicated by the green circle below) too apply a mask.
Step 11
Now we want to paint with black in the mask to hide the areas we
don't need or don't want to see. When using masks the rule is: white
reveals and black conceals. If you need soft transitions, use gray. A
good way to paint away areas in your selection is to lower the opacity
of your brush, then sweep across the areas you want to get rid of until
you have the transition result between the two layers you would want. Bonus Tip: Keep your finger at the X button to flip between black and
white. It's always good to go back and forth like this in smaller areas
until you get what you want. The D key will make your foreground and
background colors black and white if the colors are set to something
different than black and white. If you want to see only the mask on your
screen to smoothen out the areas, hold down the Alt key and click the
mask.
Step 12
Now you want to do the same process with the ear. Depending on the
picture you would try out different free transform modes you also could
use. For the ear I did use warp. I also did a minor part from the
hairline at the man's right side, rotated , and scaled it slightly just
to get a better start for the missing hairline. Then I cloned where
needed.
If you look at my layers here, don't be confused. The "retouch" layer
is the next step, but when doing the picture I didn't decide on the
hairline right away. The layer called "Layer 1" is the hairline layer.
Step 13
After getting all the larger parts into place, I went back to the
Clone Tool and touched up all the edges I needed to fix. This is what I
put on its own layer; the "retouch" layer. Usually you want the Opacity
on the Clone Tool set down so you get better control over the cloning
and can do them in more than one sweep. Just drag over the area until
you get the result you desire. Command + Z is of course something you
want to keep your fingers at during the whole of this process.
Step 14
Often when you go about doing the last retouching, you would use
different layers for different parts. If you don't want a lot of layers,
just merge them down when you are satisfied. I usually do small parts
on different layers and merge them back to one "retouch" layer, but
never merge these basic layers. You don't want to merge everything together if you later see
something you didn't spot right away. It's always good to be able to go
back and delete only the "retouch" layer, and fix that, or the
eye-layer, if you found something out of place in it, and so on.
Step 15
So now the restoration part is done.
Step 16
The next thing I do is to select all the layers and group them.
Command + G. Then I make a new layer from this group. Command + Shift +
Alt + E and rename it "noise." This layer is for our noise reduction.
One thing I want to point out, which I probably haven't mentioned. As you can see from my layers below I've kept the original file in
the PSD as the background layer, and then turned it off. I like to keep
the original file together with my PSD file, so I always start by
jumping this (Command + J). This way I get an exact copy to work from,
then turn of the background. Bonus Tip: If you hold the Alt key down while clicking on the eye in
front of the background image, you turn this layer on and all the other
layers off. Click again to turn this layer off, and all the others on.
Good for quick comparisons.
Step 17
Now we remove noise in the image. Noise reduction is done in various
ways, but here I use the Reduce Noise filter found under Noise. I
exaggerated the noise reduction a little for this tutorial, and believe
my original numbers were 8 for the strength and about 20 for detail. Another tip here is to go into the Advanced Dialogue and crank the
strength up to full in the blue channel with 0 on details. In the red
channel you crank also the strength up high with some detail, and leave
the red channel with no alterations. This lets the red channel keep some
of the details in the picture without blurring it too much. This
technique I got from Taz Tally, and is what you also would want to do to
remove patterns or scan lines.
Step 18
After noise reductions we would go on to sharpening. Sharpening is
another big topic, but a common use, and a good one, is the High Pass
Sharpening. When you apply the High Pass filter, you would want to use
low settings. For this tutorial, I have raised the values a bit too much, and you
would want to see less in the gray picture than here. The edges are what
you want to sharpen. There are also some technical issues you want to
keep in mind. When you sharpen for print, you always want to over-sharpen a little
on screen. Printers have a natural way to blur out pictures a little.
When you have applied the High Pass filter you would set the Blending
Mode to Overlay or Soft Light. I usually make use of a little over
sharpen anyhow, and then lower the value by using the opacity control.
Bonus Tip: Often you would want to sharpen only areas of the picture.
In the example picture below, I've made a mask and painted away
everything but the face, so this is the only part that gets sharpened.
Often this technique is used for only the eyes. The technique works also well using curves to lighten or darken areas
of the picture. If you only want the eyes lighter, you would make a
curves layer, hit Command + I to invert the mask, making the mask go
black, and paint back with white where the eyes are, and so on. It's
quicker to invert the mask than starting to paint away everything you
don't want.
Advertisement
Step 19
In this final step, I did adjust the contrast with an s-curve. This
step I didn't make use of in my original file, and you would probably
want to do it before the sharpening, but I added it here just to get a
more complete workflow overview, since that is the nature of this
tutorial. I often make use of Command + Shift + Alt + E to make a new
layer from the layers below, and that's what I would have done here. I would have put the "curves" layer over the "noise" layer, then
merging all the layers below to a new layer on top. Next sharpen this
with the High Pass filter, keeping the curves layer intact, just in case
I wanted to go back and adjust the last two steps.
2. Conclusion
So this was a the whole process of restoring an old, torn photograph.
But keep in mind that a lot of these steps can be explored in greater
depth. Always experiment and look for things you could add to your
workflow to get an even better result.