Photoshop: Skull Face Tutorial
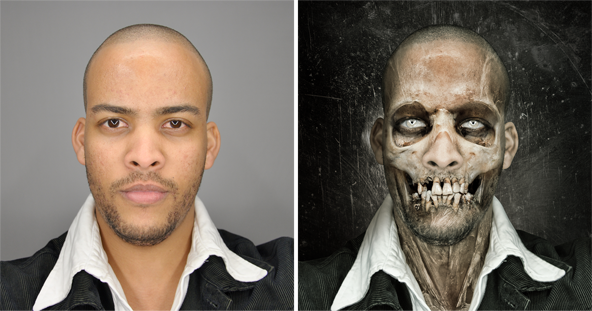
This composite is put together using a primary figure image, a selection of skulls and some ‘flesh’ textures:
PREPPING THE FACE
The first step is to find a suitable stock image for base figure; it’s worth selecting a portrait style pose, facing straight on; this will make life easier when matching the skull stocks. For the example piece, Ive used an image by MinorphicPhoto (DeviantArt).
Start off by removing the background from your base figure – I used a Layer Mask and the Pen Tool. Check out our Pen Tool Background Removal article if your not familiar with this technique. You may want to pull in a new background to start adding a sense of mood, I used some film textures from Lost&Taken.com.
LOSE THE EYEBROWS
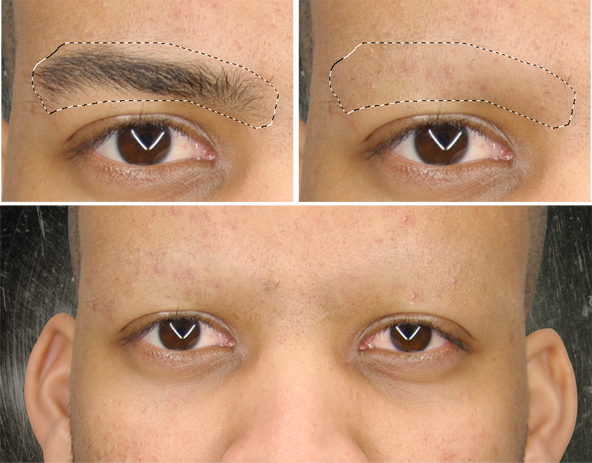
Eyebrows usually get in the way with this type of work, so it’s a good idea to get rid of them! This process is very straightforward, simply use the Patch Tool (J) to draw a rough selection around the eyebrow, and then click and drag to a clear area of skin – this will ‘content-aware’ fill the eyebrow area and usually works quite well. Repeat for the second eyebrow.
EVIL EYES
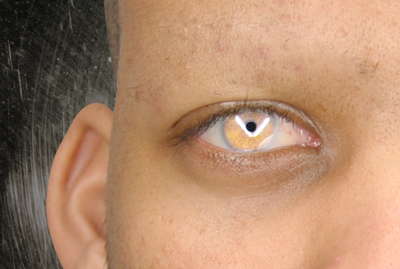
You may want to tweak the stock model’s eyes to ramp up that evil aesthetic. I used a little technique here involving duplicate layers and Screen Layer Mode. I’ll be doing a seperate tutorial on this style of eyes in the near future – so stay tuned for that one!!
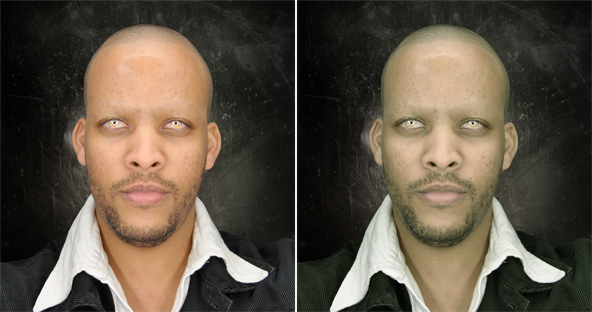
MUTE SKIN TONES
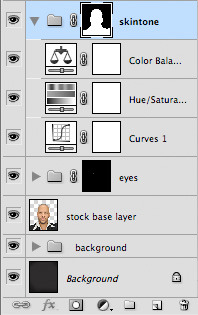
Chances are your stock model will have a healthy skintone like our example gentleman.. A tweak of the skintones will help match the muted colours of the bone and also contribute to the macabre nature of the work. Create a new Layer Group (Ctrl/Cmd+G), and within the group use Adjustment Layers to work with the skin tones.
I used a couple; Curves, Colour Balance and Hue/Saturation. For your own piece, use your preferred method to drain some of the life out of those cheeks! Once you are happy with the overall skintone, add a Layer Mask to the group that contains your Adjustment Layers and Invert the mask to Black (Ctrl/Cmd + I).
Create a selection based on your stock model base layer (Ctrl/Cmd + click layer icon) and fill that selection with white on the skintone Layer Group Mask. This will apply all your adjustments to the figure only, and not the background. Your layer stack may look something like this:
Before and after our skin muting adventures:
DEM BONES
Now it’s time for a bit of ‘bone work.. If your lucky, you may find just one skull image that fits nicely with your base stock – that wasn’t the case with me!! Here are the skull stocks that I used to construct the example piece.
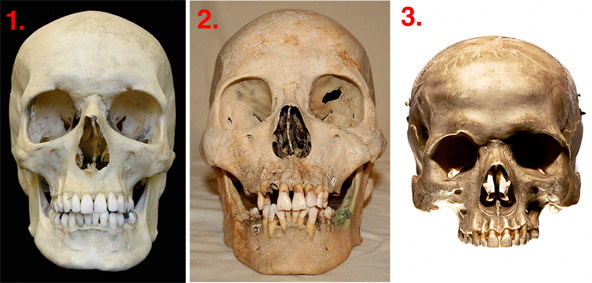
Whatever skulls you are working with, perform a background removal on each stock image so you are left with the skull only.
CONTORTING THE SKULL
Place your skull over the stock base layer; you may want to temporarily switch your skull to Overlay Layer Mode, so you can see how it ‘fits’ the face. Use the Distort Transform (Edit > Transform > Distort) to contort the skull stock to fit the model’s face. Once happy with the position, you may switch the Layer Mode back to Normal.
BLENDING ELEMENTS
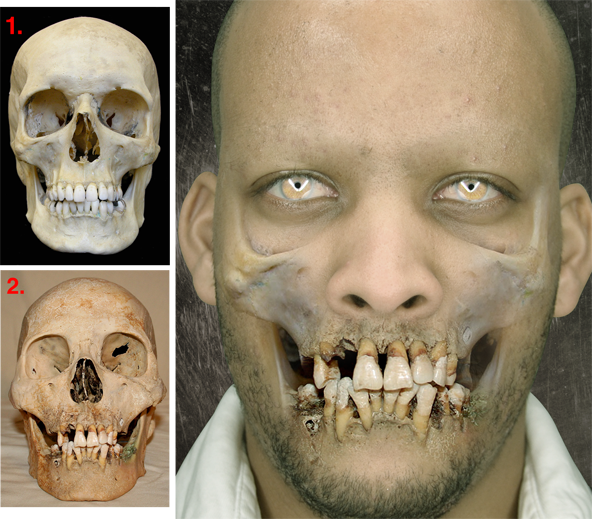
This step arguably represents the true ‘art’ of the walkthrough. Add a Layer Mask to your skull layer(s) – invert the mask to black (Ctrl/Cmd + I) and then paint the skull elements back into the image using a large Soft-Edged Brush (B) set to white. In the screenshot below, all skull layers are set to Normal Layer Mode:
SOFT LIGHT / OVERLAY
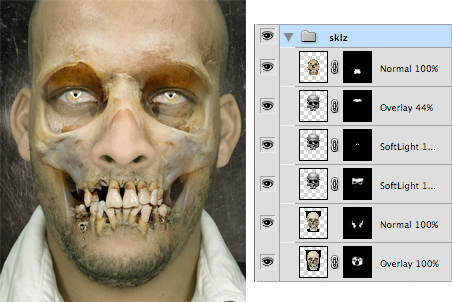
Aside from using Normal Layer Mode, Soft-Light and Overlay are also used for more subtle bone effects. Using the techniques outlined above, ‘paint-in’ skull elements over your composite – but try using Soft-Light and Overlay modes to achieve a more restrained look. A new Layer Group for your skull elements is always helpful to keep things organised. Here’s the layer stack showing all the skull elements and their respective Layer Modes / Opacity:
SLAUGHTER SKIN
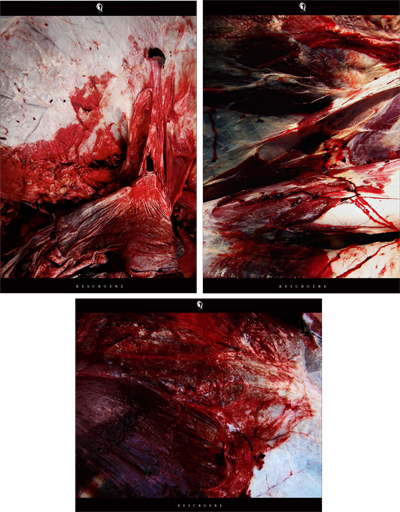
A selection of gore stocks were used for the decomposing skin effects, these elements were sourced from the Resurgere Slaughter Pack (DeviantArt)
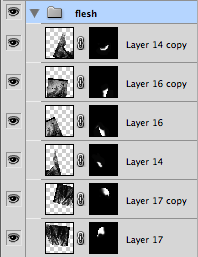
These flesh elements were blended using Layer Masks and set to Soft Light Layer Mode. Each of the gore layers were desaturated (Shift, Ctrl/Cmd + U), the desaturation basically stops the red tones overpowering the composite – but this is down to personal preference. The Layer Group containing the flesh elements:
FINAL ADJUSTMENTS
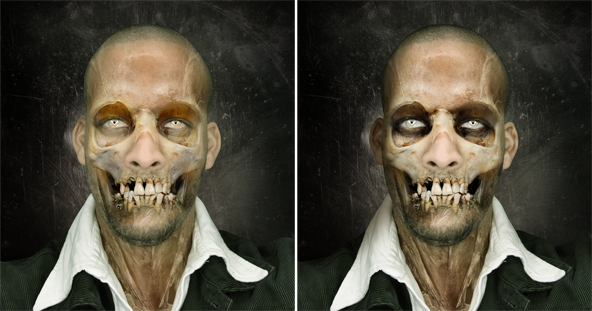
To darken / accentuate contours and recesses – use Levels Adjustment Layers to reduce brightness, set the mode to Soft Light and selectively paint in using the masks. In the example I also created a new layer (set to Soft Light), and painted with a dirty yellow colour to take the greys out of the cheekbones. Little touches, but well worth the effort:
THE RESULT..
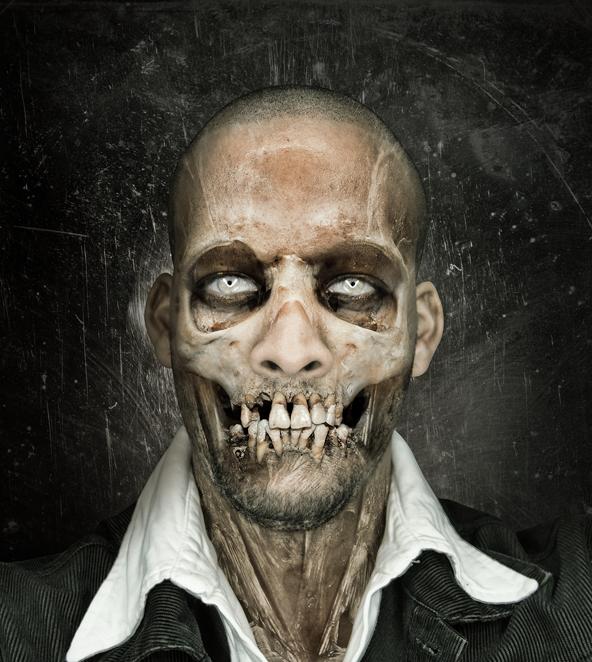
For the final version, I ran our new ‘HD-Raagghh’ Photoshop Action through it, and it spat out this beast:
REVIEW
I hope you enjoyed the first entry in our new series – be sure to tell your friends!!


Serem gan, tapi keren
ReplyDeleteThat just made my day! Thanks so much for the kind words :)
ReplyDeleteRegards,
Edd.
Designer@ Background Removal Service/Clipping Path/Clipping Path Service/Neck Joint Service/Image Masking Service/Color Correction Service/Background Removing Service/Photo Retouching Services/Background Remover
I wish more authors of this type of content would take the time you did to research and write so well. I am very impressed with your vision and insight. clipping mask photoshop
ReplyDelete