
A Quick and Effective Way to Enhance Contrast in Photoshop
This is probably the most useful little adjustment I’ve come across (in Photoshop) just playing around a few years ago. It has served me well, and I hope it will do the same for you all, as there is not a single photo I have ever taken that does not look better without it. NEVER.
Very very simple.
1. Image>Adjustments>Auto LevelsYou could do the levels manually if you want to, but auto tends to do pretty much the same thing I would have done.
2. Duplicate your layer.The shortcut is Command+J (control on a PC)
3. Image>Adjustments>EqualizeThis function remaps your pixels to incorporate every range of brightness. So your brightest pixels will go white, and you darkest will go black. After this command, if you look at your histogram, it will almost be level all the way across. Your image will probably look like a really bad HDR-ish image, which is to be expected.
4. Set the equalized layer’s blending mode to Soft LightYou will notice that your image looks less bizarre and much more contrasty.
5. Drop the Soft Light layer’s opacity.I always drop it down to between 30-35%, but you can try different opacities to fit your liking.
6. Merge the layers together, and you’re done!
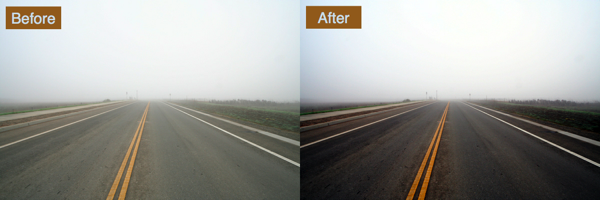
Here’s an example of what it does.
Here’s an example of what it does.


0 comments: